
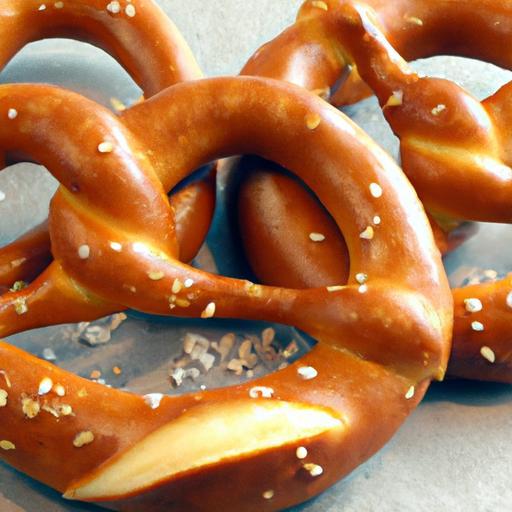
There’s somthing undeniably magical about the warm, doughy embrace of a freshly baked soft pretzel. That golden-brown crust with a slight sheen, the tender, chewy inside, and that signature sprinkle of coarse salt awaken a craving that’s hard to resist. “Twist & Shout: Crafting Perfect Homemade soft Pretzels” takes you on a flavorful journey from simple ingredients to bakery-worthy bites right in your own kitchen. Whether you’re a seasoned baker or a curious beginner, this guide will unravel the art and science behind every twist and turn, ensuring your homemade soft pretzels come out irresistibly soft, perfectly seasoned, and downright shareable.Let’s dive in and turn humble dough into a joyful snack that invites you to twist, shout, and savor every bite!
Twist & Shout: Crafting perfect homemade soft pretzels begins with mastering the art of dough preparation-a balance of softness and chewiness that makes every bite irresistible. Originating from European baking traditions, these pretzels have evolved into a beloved snack worldwide, admired not just for their iconic shape but their tender crumb and delectably golden crust.
Prep and Cook Time
- Preparation: 20 minutes
- Proofing: 1 hour 15 minutes
- Baking: 15 minutes
- Total Time: 1 hour 50 minutes
Yield
8 generously sized pretzels
Difficulty Level
Medium – ideal for excited home bakers who want to level up their baking craft
Ingredients
- 1 1/2 cups warm water (110°F/43°C), crucial for yeast activation
- 1 packet (2 1/4 tsp) active dry yeast
- 1 tbsp granulated sugar
- 4 cups all-purpose flour, sifted
- 2 tsp fine sea salt
- 4 tbsp unsalted butter, melted and slightly cooled
- 10 cups water (for boiling bath)
- 2/3 cup baking soda (sodium bicarbonate)
- Coarse pretzel salt, as needed for garnish
- Optional toppings: melted garlic butter, sesame seeds, poppy seeds, grated Parmesan
Instructions
- Activate the yeast: In a large bowl, combine the warm water, yeast, and sugar. Stir gently and let sit for 5 minutes until frothy and bubbly, confirming yeast is alive.
- Prepare the dough: Gradually add the sifted flour and sea salt to the yeast mixture, stirring with a wooden spoon until a shaggy dough forms. Incorporate the melted butter,then knead by hand on a lightly floured surface for 8-10 minutes until smooth and elastic.The dough should be soft, slightly tacky but not sticky.
- First proof: Place the dough in a lightly oiled bowl and cover with a damp cloth. Let it rise in a warm, draft-free place until doubled in size, about 1 hour.
- Dive into the twist: Punch down the dough gently and divide into 8 equal portions.Roll each piece into a 20-24 inch rope. Lay the rope in a classic pretzel shape: form a “U,” cross the ends over twice, and press the twisted ends onto the bottom curve to seal. This creates the iconic twist that entices both eyes and appetite.
- Prepare the baking soda bath: In a large pot,bring the 10 cups of water and baking soda to a rolling boil.this alkaline bath is key to achieving that perfect golden brown crust and subtle tang.
- Boil the pretzels: Carefully lower each shaped pretzel into the bubbling bath for 30 seconds, using a slotted spoon to flip halfway through for even coating.Remove and drain on a wire rack.
- Season and bake: Promptly sprinkle coarse pretzel salt or your favorite toppings on each pretzel while still damp.Transfer to a parchment-lined baking sheet.
- bake to perfection: Bake in a preheated 450°F (230°C) oven for 12-15 minutes until pretzels turn a deep amber color and blisters appear across the surface.
- Final touch: For extra flavour, brush warm pretzels with melted garlic butter just as they come out of the oven.
Tips for Success
- Perfect yeast activation: Ensure your water is warm but not hot-above 115°F can kill the yeast, below 100°F slows activation.
- Flour adaptability: Using bread flour instead of all-purpose will add more chewiness due to higher gluten content.
- Dough thickness: Avoid rolling ropes too thin; 20 inches is ideal for a sturdy but soft pretzel.
- Baking soda bath option: If baking soda is unavailable, use food-grade lye (with caution) for an authentic crust, but baking soda delivers excellent results safely.
- make-ahead tip: Shape pretzels and refrigerate on baking sheets overnight. boil and bake fresh just before serving for superb convenience.
Serving Suggestions
serve your soft pretzels warm, with classic mustard dips such as spicy brown or honey mustard. For a decadent twist, accompany with cheese sauce or a creamy beer cheddar dip. Garnishing with fresh herbs like chopped rosemary or a sprinkle of smoked paprika can elevate the visual appeal and flavor profile.
Pair your pretzels with craft beers or a cozy cup of hot cocoa for a delightful snack or party centerpiece. For a modern touch, use pretzel bites topped with everything bagel seasoning and serve alongside homemade ranch dip.
| Nutritional Info per Pretzel | Calories | Protein | Carbs | Fat |
|---|---|---|---|---|
| Soft Pretzel | 220 kcal | 6 g | 42 g | 3 g |
Enhance your baking journey further by exploring our guide on homemade cheese sauces, perfect for dipping your freshly baked pretzels.
For additional insights on the science behind baking soda baths and pretzel chemistry, visit the King Arthur Baking blog.

Q&A
Q&A: Twist & Shout – Crafting Perfect Homemade Soft Pretzels
Q1: What makes a soft pretzel truly “soft” and not chewy or tough?
A1: The secret lies in the dough’s hydration and the baking soda bath! A well-hydrated dough keeps pretzels tender, while briefly boiling them in a baking soda solution before baking creates that signature chewy crust with a glossy finish.It’s this magical alkaline bath that sets soft pretzels apart from other breads.
Q2: Why do pretzels need to be boiled before baking? Can I skip this step?
A2: Boiling pretzels in a baking soda bath is essential. This step gelatinizes the dough surface, giving pretzels their unique texture and deep brown color when baked. Skipping it means missing out on that classic crust and flavor-the end result might look like a roll instead of a pretzel!
Q3: How do I achieve that perfect twist without the pretzel unraveling?
A3: Think of pretzel twisting as playful dough origami. Roll your dough ropes evenly, then make a loose “U,” cross the ends twice, and press firmly onto the base of the “U.” Pressing seals the dough together, ensuring your twist stays intact during baking.
Q4: What are some creative toppings or flavor variations I can try?
A4: Beyond the classic coarse salt, the pretzel canvas is vast! Sprinkle everything bagel seasoning, cinnamon sugar for a sweet twist, or garlic parmesan for savory allure. Brush with melted butter post-bake for extra richness or dip into homemade cheese sauce to elevate the experience.
Q5: can I make soft pretzels ahead of time and reheat them without losing quality?
A5: Absolutely! After baking, cool pretzels completely, then wrap tightly and freeze. To reheat, pop them in a warmed oven at 350°F (175°C) for about 5-7 minutes.this revives that fresh-baked aroma and softness, almost like they just rolled out of your kitchen.Q6: Is there a gluten-free option for these delightful pretzels?
A6: Yes, but with some tweaks! Gluten-free dough can be trickier to shape and boil since it lacks elasticity. Use a blend of gluten-free flours with xanthan gum, and handle the dough gently. Lower the boiling time to prevent falling apart. While the texture differs, you can still capture the essence of a soft pretzel.Q7: What tools or equipment are recommended for beginners?
A7: Start simple! You’ll need a large mixing bowl, a baking sheet, parchment paper, and a pot for the baking soda bath. A sharp knife or kitchen scissors help with shaping. Optional but handy: a kitchen scale for accurate measurements and a candy thermometer to monitor water temperature for dough proofing.
Q8: How long does it typically take from start to finish to make homemade soft pretzels?
A8: Expect about 2 to 2.5 hours total. This includes mixing and kneading the dough (~15-20 minutes), proofing (rising) for about an hour, shaping and boiling (~20-30 minutes), and baking (~12-15 minutes). Patience yields pretzel perfection!
Twisting your way to homemade soft pretzel bliss might sound daunting,but with these insights,you’re ready to warm hearts – and ovens – with golden,pillowy delights. so grab your dough, boil with confidence, and don’t forget to twist & shout!
Future Outlook
As the warm, golden twists of your homemade soft pretzels emerge from the oven, perfectly puffed and beautifully browned, you’ve not only crafted a delicious treat-you’ve also connected with a timeless tradition of comfort and craftsmanship. Whether dipped in mustard, smothered in cheese, or savored plain, these pretzels are more than just a snack; they’re a party of patience, technique, and the simple joy of baking at home. With each twist and every sprinkle of salt, you transform basic ingredients into a culinary experience that’s as rewarding to make as it is to eat. So next time the craving strikes, remember: the perfect soft pretzel is just a twist away. Happy baking!